Friday, October 11, 2013

how to make a Greenland paddle


There is  a trend towards using the Greenland paddle now, more and more paddlers are making the switch and there are numerous paddle makers supplying them. Its pretty simple to make your own if you have any basic woodworking skills, or even if you dont. You need some basics to get going. a place to work, a nice piece of wood and some simple hand tools

The GP is made to fit the user and after a short explanation everybody decides on the dimentions of their paddle , marks out their wood and begins to work. First is getting the  the edge profile drawn out and then planing the wood to the correct thickness. This is a good exercise as it allows first time users to get the feel of working with a wood plane and little mistakes are not important . By the time everybody has finished this step they are more competent with the plane


Most important is a good sharp plane, I ask everyone to bring one with them and most manage to get their hands on one. Most of the time they are unuseable , havent been used for years, rusty or totally in need of a good sharpening . Luckily I have a few lying around and can supply them for the day. 

Next we draw the blade and loom shapes on the face of the paddle and cut it to the rough shape, I use a mirror to watch the underside and avoid cutting into the blades.

Its always interesting to see the different types of workers, some like Ilan are perfectionists and get everything just right, while others are less so. In the end everyone gets to go home with a useable paddle so even if you dont work to such a high standard its not that noticable  in the end. 

Once the paddle shape has been achieved and straightened out it already begins to look like a paddle

and you can begin to imagine using it on the water

I use a jigsaw, but Ilan prefers to use the japanese pull saw, it takes a bit longer but gives a nice neat accurate cut, if I had a band saw, that would be ideal.

By this time we all need a break and usually have an hour for lunch and a bit of a sit down

The next stage is shaping the loom and the blades after marking them out on the paddle face, first with  a block plane and then finishing up with either a random orbital sander or a japanese rasp

The air gets fullof dust and masks are mandatory

Some like to sit and sand by hand

We finish by wiping the paddle with linseed oil. There are many ways to finish the paddle but the aim of the workshop is to get your paddle made, then you can go home and decide on a final finish at your leisure. Heres a link to a finish called Boat Soup, if you can get the ingredients it sounds like a very nice way to finish off your paddle

At the end of the day everybody goes home with a paddle.....almost. Sometimes someone does not manage to finish, but thats not a problem, either they finish at home or can come back to a later class and get the job done. Next step is to get on the water and learn to use your new paddle, well thats another story.

Friday, October 4, 2013

another annual trip, from the northern border Rosh Hanikra down to Sdot Yam

Although we have done it before, many times, each trip is unique 
The group is always different, lots of newcomers mixed with diehards who cant resist 3 days on the water

Acco always has a surprise when passing the old city walls


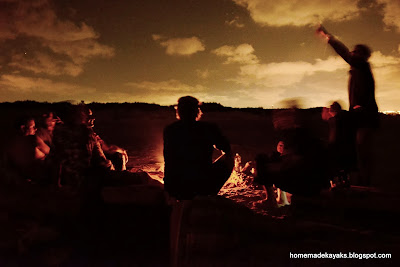
Campfires at night with the luxury of chairs make camping comfy

And this passion fruit liquor helps relieve tired paddling muscles

Looks like my prayers are going to be answered

passing Haifa there are some interesting buildings

A short snooze before a long stretch , call it a power nap


wow, what colours

all the usual suspects

we even tried to use a tarp as a sail, didnt work too well

challenge to get through the gate

second night campsite

thanks to Ginady for the great photos, its always interesting to see the world through someone elses eyes and their pictures  show the way.